
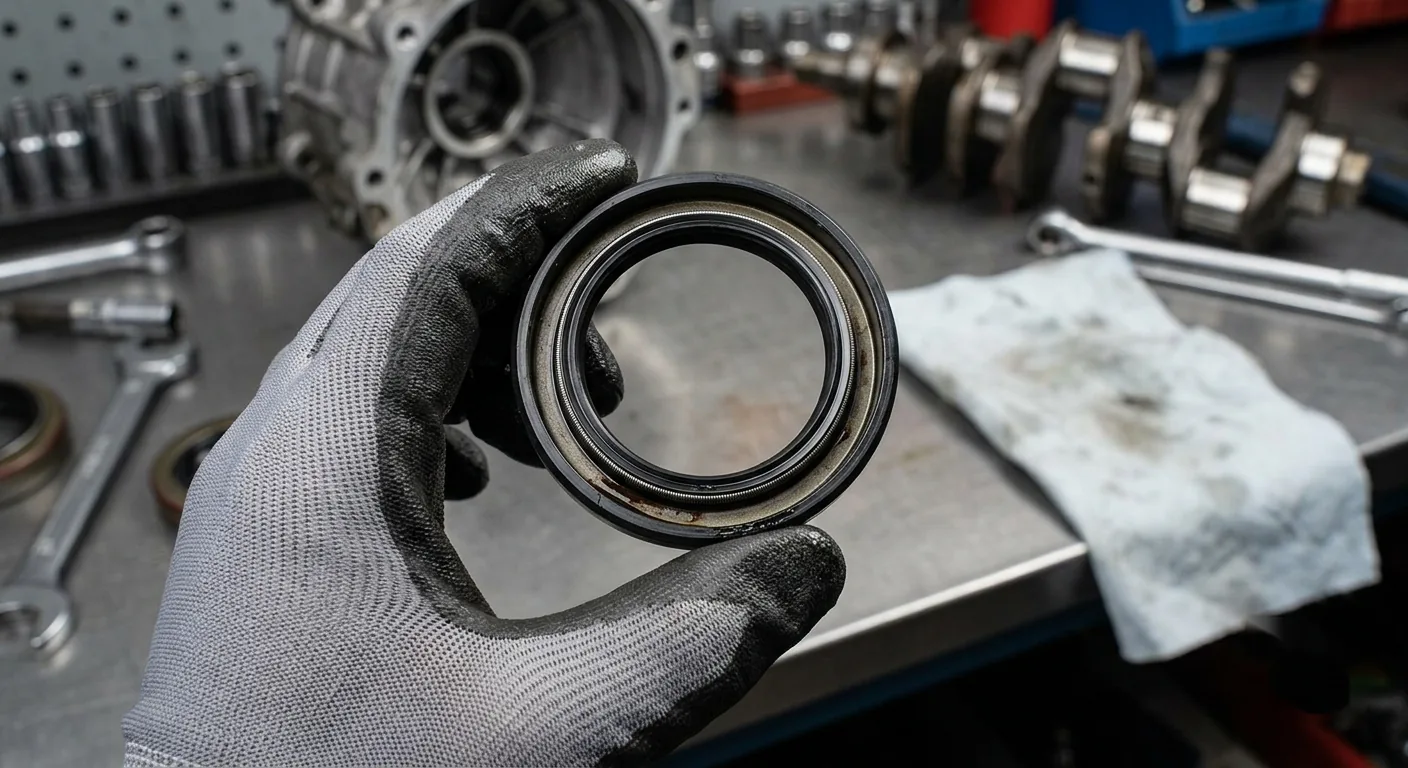
How to properly install an oil seal and prevent premature leaks
Proper installation of a seal is essential to ensure a leak-proof seal and extend the lifespan of any rotating system. This guide reviews best practices for assembly step by step, from verifying dimensions and preparing surfaces to lubrication, alignment, and final seal installation, helping to prevent premature leaks and unnecessary breakdowns.
Oil seals are essential components for ensuring leak-proof operation in industrial equipment, motors, gearboxes, pumps, and a multitude of rotating systems. However, even the best seal can fail prematurely if not installed correctly.
Improper installation can lead to leaks, accelerated wear of the sealing lip, shaft damage, or permanent deformation of the seal. Therefore, following the correct assembly procedure is just as important as selecting the right seal for the application.
1. Check that the seal is the correct one.
Before beginning installation, it is essential to verify that the selected seal is suitable for the intended application. The seal dimensions, shaft diameter, and housing measurements must be checked to ensure perfect compatibility. Using a seal with incorrect dimensions can cause sealing problems from the outset and compromise the equipment’s operation.
To ensure proper operation, the sealing lip material must be compatible with the fluid being sealed. Consult our guide to choose the best sealing material based on the fluid the seal will be in contact with.
2. Remove the old seal without damaging the components
When replacing an existing seal, it is important to remove it using appropriate tools, such as extractor hooks or specialized punches. During this operation, any damage to the shaft or housing must be avoided. Scratches or deformations caused during disassembly can later become points of leakage.
3. Clean and inspect work surfaces
Before installing the new seal, carefully inspect the shaft and housing. All contact surfaces must be clean and free of dirt, corrosion, burrs, or sharp edges that could damage the sealing lip during assembly. Even a simple burr or sharp edge can causing microscopic cuts in the lip, considerably reducing the lifespan of the seal.
4. Prepare the appropriate tools
A professional installation requires the right tools. Before starting, it’s advisable to have assembly tools, protective sleeves, and tools that allow you to apply force evenly. A plastic hammer is also recommended for certain assembly operations. Using improvised tools is often a major cause of seal deformation during assembly.
5. Prepare the shaft and lubricate the contact elements
To facilitate installation, the shaft should have a chamfered or ramped edge with an angle between 30° and 50°. This geometry allows the sealing lip to expand gradually during assembly, minimizing the risk of damage. It is also recommended to lubricate the shaft, the sealing lip, and the housing before installation. Proper lubrication reduces initial friction and facilitates correct seating of the seal on the shaft.
6. Install the seal correctly
The next step is to position the seal correctly. As a general rule, the spring should face the fluid or medium to be sealed. Once positioned, the seal should be pressed in by applying uniform force across its entire reinforced surface.
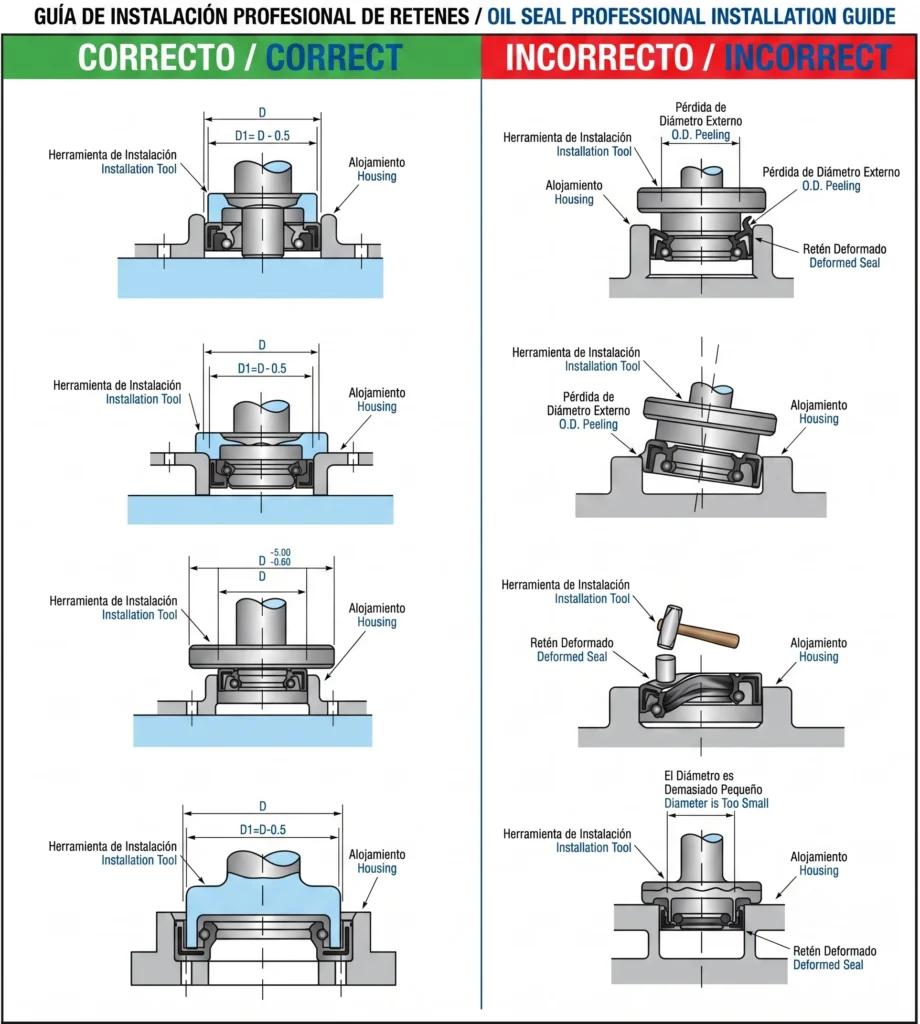
It is important to avoid direct impacts on the seal and to continuously check that it is installed perfectly perpendicular to the housing. An angled installation can cause the seal to become misaligned. When this occurs, friction between the lip and the shaft increases, which can lead to premature wear and an increase in operating temperature, accelerating the aging of the elastomer. If the misalignment is significant, the seal may immediately lose its sealing capacity.
7. Perform the final check
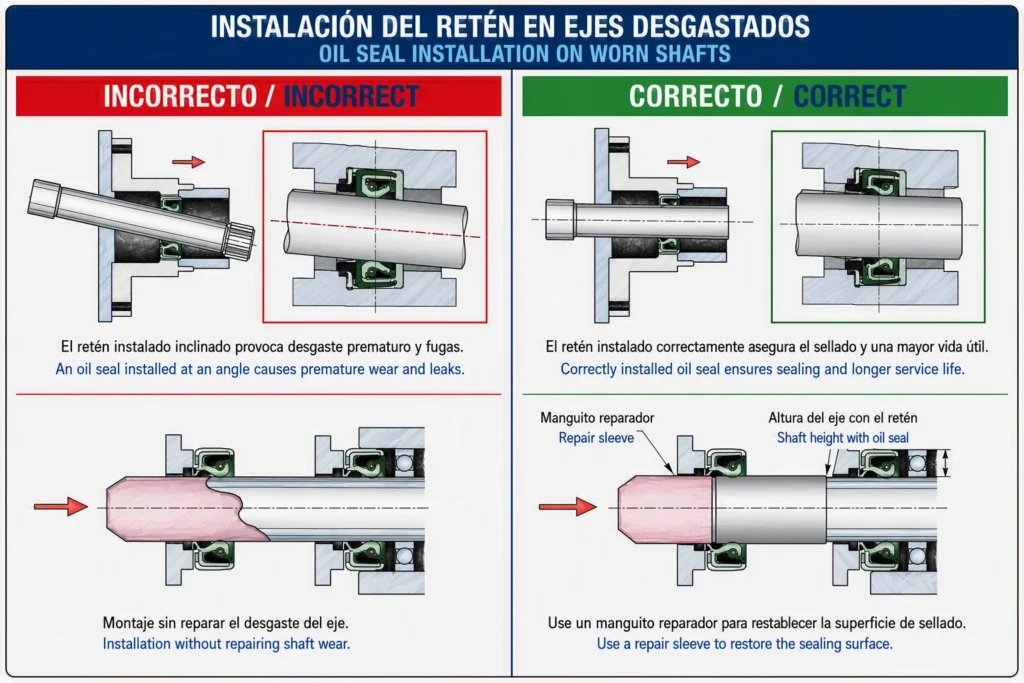
Once assembly is complete, it is advisable to verify that the system is properly sealed and check its operation before putting the equipment into service. If the shaft shows wear in the contact area with the lip, it may be necessary to use a seal of different dimensions or install a Speedi Sleeve repair sleeve to restore the working surface.
Conclusion
Installing an oil seal is a simple operation, but it requires attention to detail. Verifying dimensions, properly preparing surfaces, using the correct tools, and adhering to mounting geometries are key factors for achieving a long-lasting seal. At OSN, we offer a wide range of radial seals for industrial, automotive, hydraulic, and power transmission applications, as well as the technical expertise needed to select and install each sealing solution correctly.

